Content
Pruning and hedge shears
Sharpening
If possible, pruning and hedge shears should be disassembled before sharpening. Only the bevels (facets) are worked on both blades (upper and lower). Use the coarse (blue) DMT mini-hone for rough corrections or to remove nicks from the blade. Use the fine (red) mini-hone for finishing.
DMT Dia Sharp Mini Hone Set (No. 706282).

Assembly / Disassembly
- Make sure you use appropriate wrench sizes to avoid damaging the screws
- When assembling the tool, you also adjust the blades; do not overtighten the screw, and check that the tool works smoothly and easily
Sharpening process
- Hold the shears securely on a stable surface with one hand
- Move the hone over the cutting edge from the front, keeping the bevel angle

Removing the burr
- To remove the burr, carefully guide the fine hone along the back of the blade

![]()
Pro-Tip
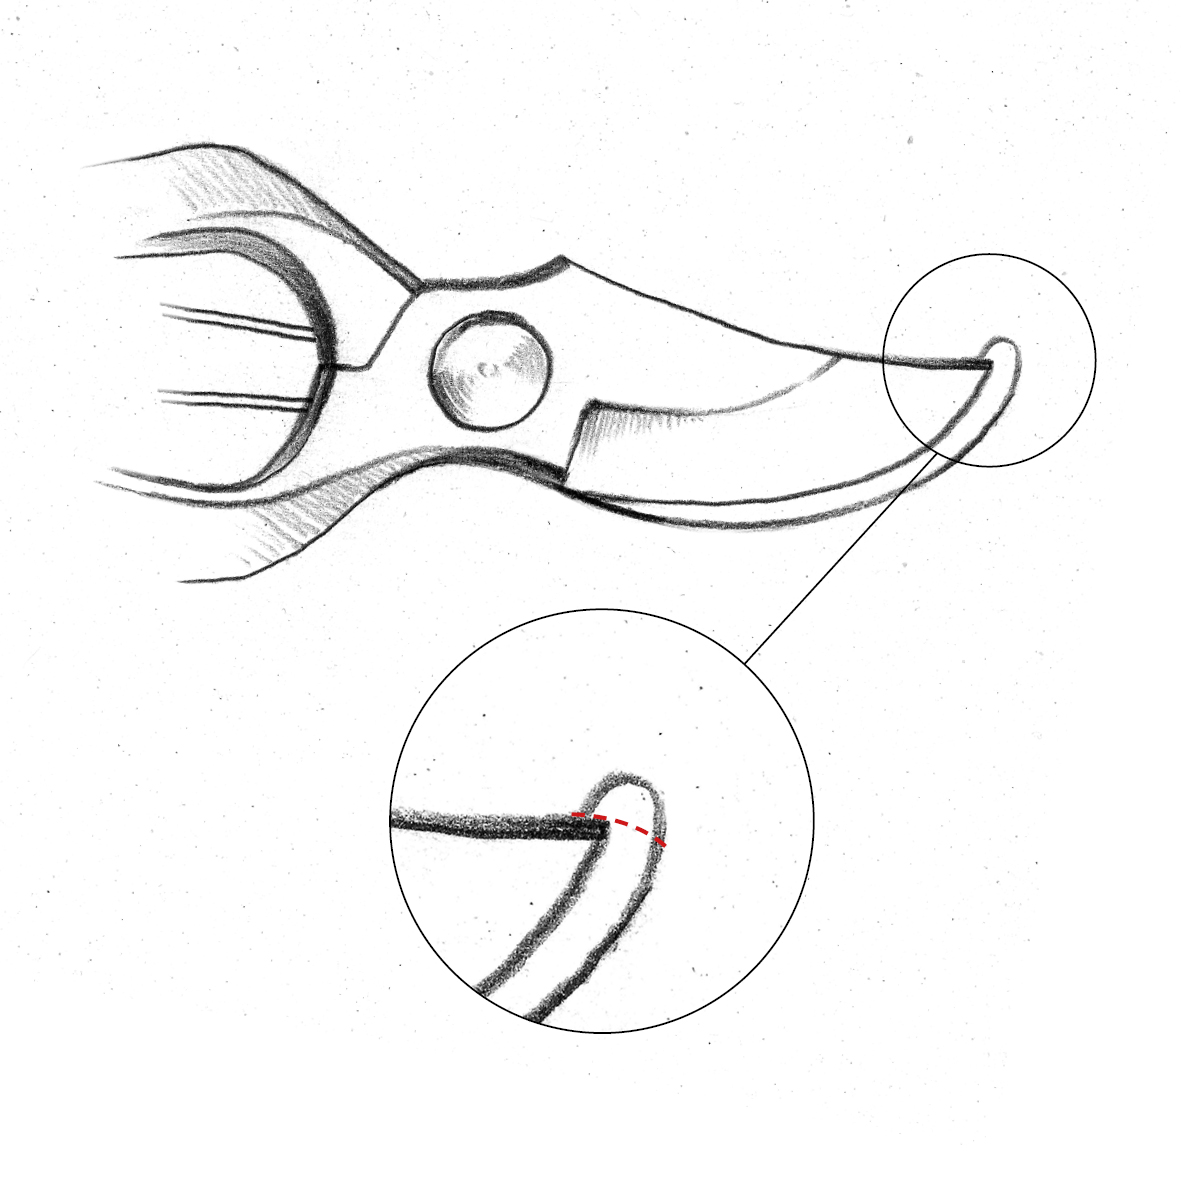
If, during assembly after the sharpening process, you notice that the counterpart protrudes over the blade when closed, this protrusion can be easily removed for an optimal fit. To do this, mark how much material needs to be removed and remove the protrusion on a coarse roughing stone, on sandpaper or a belt or disc sander until the marking line. Round the tip and break the edges slightly.
Especially with pruning and hedge trimmers, which have already been sharpened several times, this protrusion can result.
Maintenance
Pruning shears can get quite dirty because they tend to be used outside and get contaminated with plant juices. To ensure that the shears operate smoothly and to remove the dirt, use Ballistol spray (No. 705445). Spray some oil into the joint and onto the blade and polish the blade with a dry cloth.
